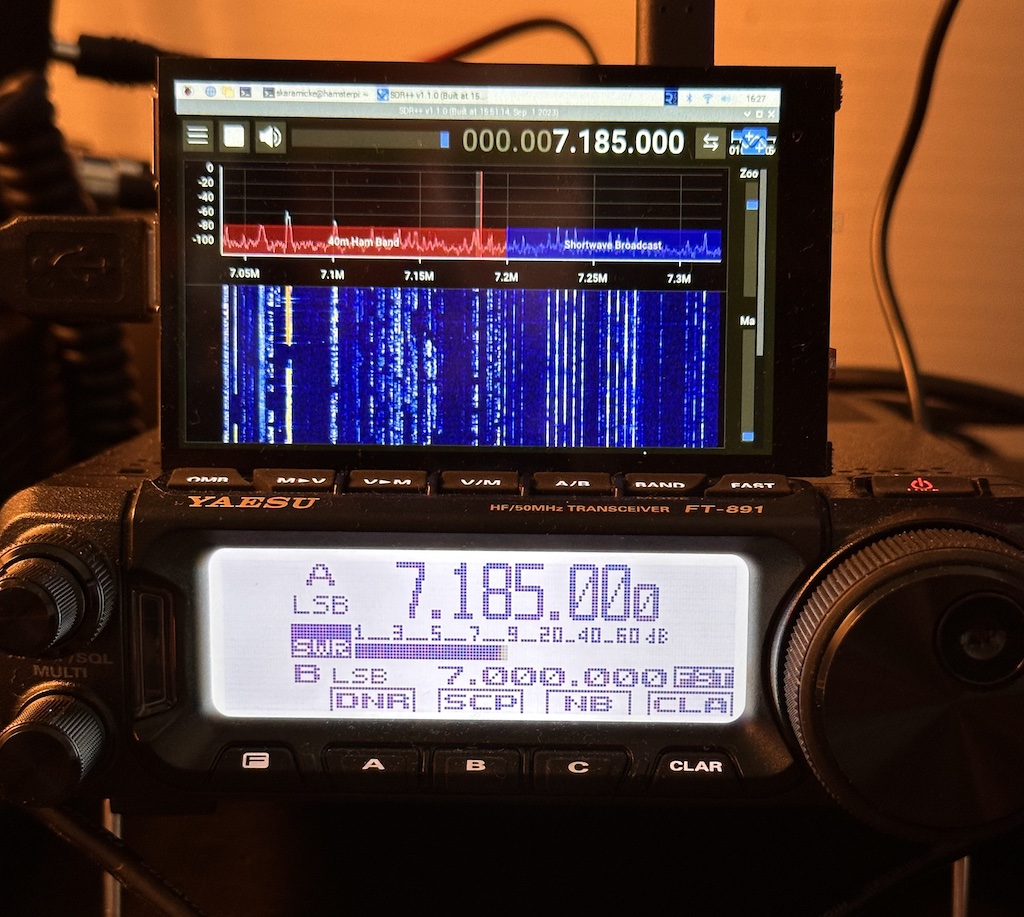
Panadapter for Yaesu FT-891

Raspberry Pi 4 touch screen SDR Panadapter for the FT-891 with two-way CAT control.
{}
This is one of my RND projects, which is very much still a work in progress. I’m writing this down so I don’t forget what I did, and to help others who might want to do the same.
The steps below are specific to the hardware listed, so please keep that in mind when adapting them to your own setup.
Hardware
- Radio: Yaesu FT-891
- SDR: AirSpy R2
- Upconverter: Spyverter R2
- Computer: Raspberry Pi 4B 2GB (I doubt the amount of RAM matters)
- Display: Hyperpixel 4.0 800x480 touch screen
- RF relay: MFJ-1708B-SDRS (the one with SMA connector to the SDR)
- Power: maas SPS-250II switching power supply, driving both the radio and the MFJ-1708B-SDRS (Not relevant for software, but I’m listing it here for completeness)
Software
The software consists of the following components:
- flrig
- SDR++
- cat-relay
Process
This might not be all together correct because I experimented my way to it. I’ll do a fresh run some time and check what’s correct and not. I’ll start with a rough outline of what I did, followed by a detailed description of what I believe to be the important steps.
Rough pre-steps
- I used the Raspberry Pi Imager to install Raspbian 32bit OS on a microSD card. My card is 256GB V30 card from my drone photography, but I think that’s overkill.
- I then installed a bunch of packages using km4ack/build-a-pi, most notably
hamlib.
Detailed steps
SDR++
SDR++ has to be built from source on Raspberry Pi. I used the following steps to do so.
RtAudio
This sequence downloads rtaudio-5.0.2, builds and installs it. You can’t use rtaudio-6 eventhough it’s there, because SDR++ doesn’t support it yet as of 2023-09-01.
wget http://www.music.mcgill.ca/~gary/rtaudio/release/rtaudio-5.0.2.tar.gz
tar xvzf rtaudio-5.0.2.tar.gz
cd rtaudio-5.0.2
mkdir build && cd build
cmake ..
make
sudo make install
codec2
The following will clone, build and install codec2.
cd ~/
git clone https://github.com/drowe67/codec2.git
cd codec2
mkdir build
cd build
cmake ..
make -j $(nproc)
sudo make install

# Manually install freedv_rx since it's not part of the default install package
sudo install -m 0755 src/freedv_rx /usr/local/bin
sudo install -m 0755 src/freedv_tx /usr/local/bin
cd ../..
sudo ldconfig
SDR++ prerequisites
The above two are also prerequisits, but these are ready made packages so the go together.
sudo apt install -y build-essential cmake git libfftw3-dev libglfw3-dev libglew-dev libvolk2-dev libsoapysdr-dev libairspyhf-dev libairspy-dev libiio-dev libad9361-dev librtaudio-dev libhackrf-dev librtlsdr-dev libbladerf-dev liblimesuite-dev p7zip-full wget
SDR++ itself
Note how I turn on AirSpy, because I have an AirSpy R2, and how I turn of SDRPLAY because I don’t have one. The SDRPlay source was giving me a lot of trouble, but the other default sources seem to have worked fine.
cd ~/
git clone https://github.com/AlexandreRouma/SDRPlusPlus.git

cd SDRPlusPlus
mkdir build
cd build
cmake .. -DOPT_BUILD_AIRSPY_SOURCE=ON -DOPT_BUILD_SDRPLAY_SOURCE=OFF
make
sudo make install
sudo ldconfig
Connecting everything
- Connect the antenna PL-259 to the MFJ-1708B-SDRS SO-239 connector labelled “ANT”
- Connect a short coax between the MFJ-1708B-SDRS SO-239 connector labelled “XCVR” and the radio’s antenna connector
- Connect a USB-A to USB-B cable between the radio’s USB port and the Raspberry Pi
- Connect an SMA to SMA cable between the MFJ-1708B-SDRS and the SpyVerter R2 on the side without the USB connector
- Connect an SMA to SMA cable between the SpyVerter R2 on the side with the USB connector and the AirSpy R2
- Connect a USB-A to MicroUSB cable between the Raspberry Pi and the AirSpy R2
- Connect the 12V DC line from the power supply to the MFJ-1708B-SDRS
Configuring the software
- Start SDR++
- For me the AirSpy R2 was already selected as the source. I increased the gain to 12.
- Enable “Bias T” so the SpyVerter R2 gets power from the AirSpy R2
- Set Offset mode to “SpyVerter”
Improvements to be made
aka “coming soon”
to this guide
- Add a section about how to configure flrig and how to start cat-relay.
to the setup
- Use PTT to switch the MFJ-1708B-SDRS instead of RF sensing to avoid the delay.